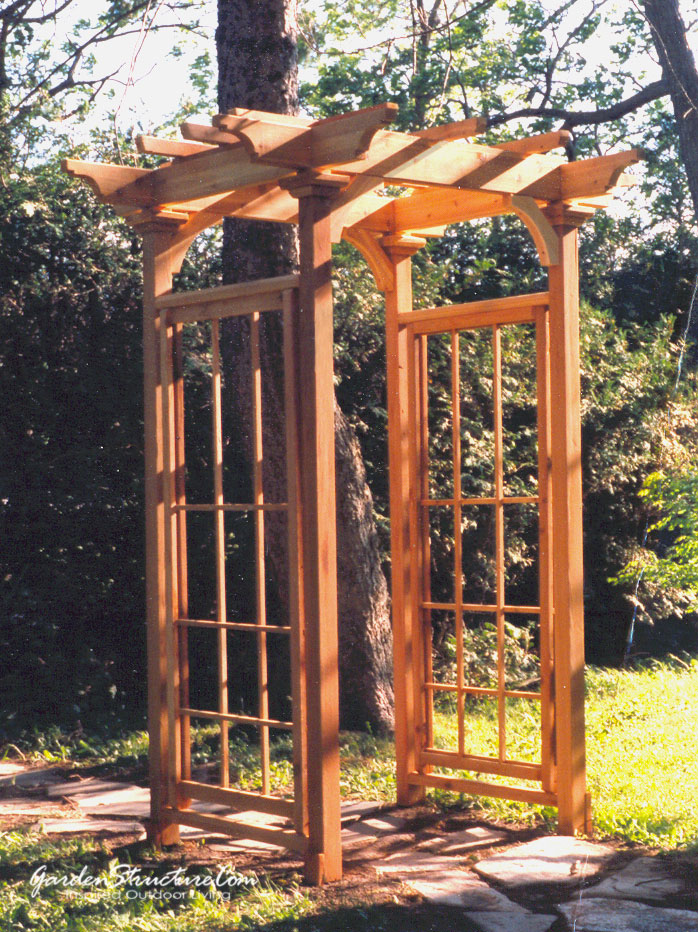
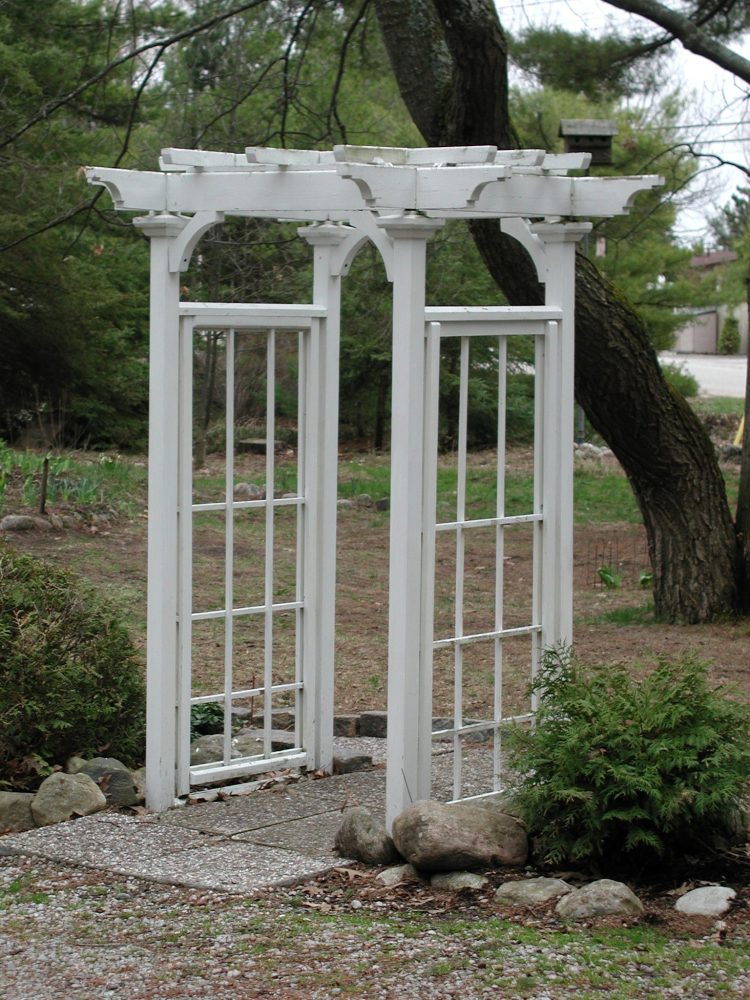
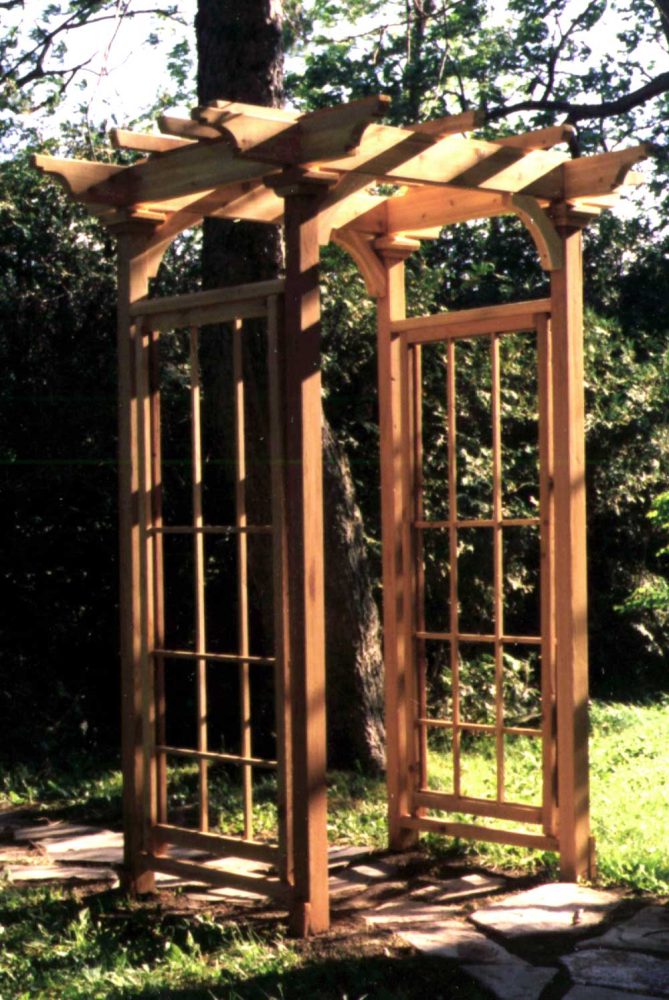
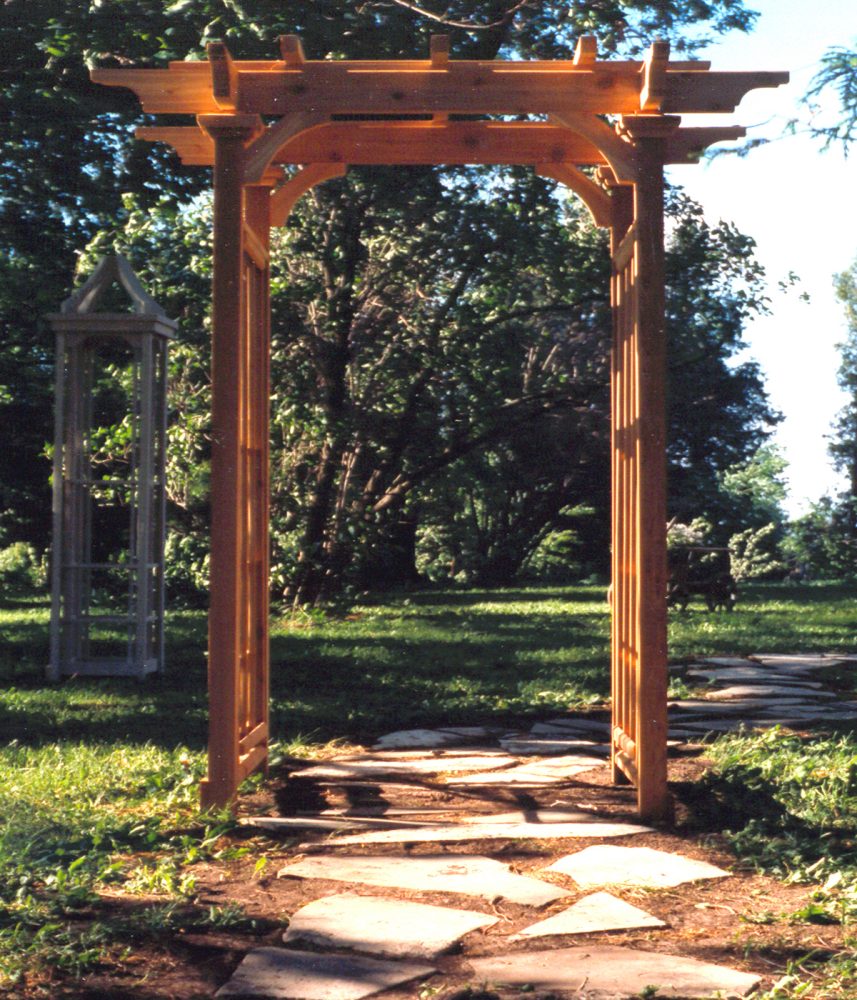
The Arts and Crafts DIY Arbour
$19.99
Our Arts and Crafts Arbour has been built thousands of times and remains one of our most popular projects. The plan is presented in 2D format, but it’s so comprehensive that even first-time builders can follow along successfully. Every purchase includes free email support while you build.
This is the classic version of our DIY Arts & Crafts Arbour. It comes with a full materials list and 2D step-by-step instructions to help you create a beautiful, long-lasting garden feature.
- Instant PDF Download
- Complete Materials List
- Designer has 30 Years Experience
- Free Email Support
- Built Thousands of Times
- Adaptable Design
- Hurricane Resistent Designs (Pergolas)
- Professional Quality
Description: These arts and crafts arbour plans have guided thousands of successful DIY arbour projects. This garden arbour design includes comprehensive step-by-step instructions that novice builders follow with confidence.
Each arbour plan purchase includes complimentary email support throughout your construction process.
Complete DIY Arbour Plans: This classic garden arbour delivers detailed materials lists alongside construction guidance. Build a lasting garden arbour focal point with these proven arbour plans.
Built for 20+ Year Performance: These arts and crafts arbour plans require more effort than basic designs, but the investment delivers decades of performance. We engineered this garden arbour design for 20-year durability while maintaining visual appeal.
Technical Features of This Garden Arbour:
- Weather Protection: Integrated drip edges extend arbour wood life
- Foundation Options: Temporary stake-in or permanent concrete footings
- Adaptable Width: Arbour plans scale up to 6′ interior width
- Installation Flexibility: Convert from temporary to permanent mounting
DIY Arbour Installation Options:
Temporary Garden Arbour Setup: Shorten posts and stake your arbour directly into soil. Later convert to permanent installation using carport brackets.
Patio Arbour Installation: Cut posts shorter, drill 1″ base holes, mount with bolt-down U-brackets for secure garden arbour anchoring.
Materials List for This Arts and Crafts Arbour:
Lumber for Garden Arbour:
- 1 pc 1×6×5′
- 3 pcs 1×6×6′ (clear grade)
- 2 pcs 2×4×8′
- 1 pc 2×6×8′
- 1 pc 2×6×12′
- 2 pcs 2×6×16′
- 1 pc 2×8×4′
- 4 pcs 4×4×12′ (or 1 pc 6×6×12′ quartered)
Hardware for DIY Arbour:
- 3′ hardwood dowel, 3/8″ diameter
- 100 pcs 3″ deck screws
- 1 lb 1¼” spiral galvanized nails
- ½ lb 3″ spiral galvanized finish nails
- Waterproof wood glue
Related Garden Structure Resources:
- Browse our complete garden structures gallery for arbour placement ideas
- Discover complementary fence designs to enhance your garden arbour
- Explore deck and outdoor living designs that pair with garden arbours
- Read our articles on garden structures for arbour design tips
- Plan your complete yard renovation project with professional resources
Why These DIY Arbour Plans Work: Building a garden arbour creates an architectural focal point. These arts and crafts arbour plans provide everything needed for successful construction. The 2D format includes such thorough documentation that first-time builders complete the arbour confidently.
Complete Architectural Drawing Set
You’ll receive professional-quality plans in PDF format:
– Full 11×17 architectural drawing sheets
– Elevation views (front, side, rear)
– Plan view with dimensions and spacing
– Construction details and connections
– Complete material list with quantities
– Professional design notes
– Adaptable to your specific needs
File Format: PDF (opens with free Adobe Reader)
Number of Sheets: Varies by plan
Print Quality: High-resolution for printing
Support Included:
Email us at [email protected] with any questions while building. We’re here to help!
Note: These are architectural drawings showing what to build. They assume intermediate carpentry knowledge.
As-Shown Dimensions:
– Overall size varies by plan (see product description)
– Hardware: Galvanized or stainless steel
– Footings: 48″ depth (verify local codes)
Materials:
– Pressure-treated lumber for ground contact
– Dimensional lumber for above-grade components
– All hardware specifications included
– Optional: Hurricane clips and brackets
Design Notes:
– Plans can be adapted to different sizes
– Suitable for various foundation types
– Compatible with roofing materials (consult engineer)
– Meets or exceeds standard building codes
Local Requirements:
Building permits and engineer stamps may be required in your area. Check with your local building department before starting construction.
Important Information – Please Read:
What You’re Getting:
✓ Professional architectural drawings (not step-by-step instructions)
✓ Plans created by designers with 30+ years experience
✓ Proven designs built successfully 1,000+ times
✓ Free email support: [email protected]
What You Need to Know:
– Skill Level: Intermediate to advanced DIY or hire a contractor
– Building Permit: Usually required for structures this size
– Local Codes: Plans may need modifications for your area
– Tools Required: Standard carpentry tools
– Build Time: Varies by project complexity and skill level
Can I Modify These Plans?
Yes! These are templates you can adapt:
– Change overall dimensions
– Adjust post heights and spacing
– Modify materials
– Add or remove features
We also offer custom design services – contact us for pricing.
Digital Product Policy:
All sales are final once downloaded. Please review all product details, dimensions, and preview images before purchasing. See our return policy for technical issue exceptions.
Questions?
Call: 416-951-9998
Email: [email protected]
We’re here to help you succeed!
coming soon


DIY PLANS- Frequently Asked Questions
Due to the digital nature of our plans, all sales are final once downloaded. Please review all product details, dimensions, and preview images carefully before purchasing.
Refunds are only provided for verified technical file issues that we cannot resolve within 48 hours. See our complete return policy for details.
These are professional architectural drawings that most building departments accept. However, some jurisdictions may require:
– Engineer-stamp on the plans
– Site-specific modifications for your area’s wind/snow loads
– Additional details for local code or zoning requirements–We can customize to their requirements if you need, so get in touch and we will put numbers to your requirements.
We recommend checking with your local building department before purchasing. We can recommend structural engineers if needed, or you can use a local engineer to stamp the plans.
Absolutely! These plans are templates designed to be adapted:
– Change overall dimensions to fit your space
– Adjust post heights and spacing
– Modify rafter sizes and spacing
– Add or remove decorative elements
– Change materials as needed
For major structural changes, we recommend running the changes by us or consulting a structural engineer. We also offer custom design services – contact us at [email protected] or call 416-951-9998 for a quote.
Plans are delivered as PDF files that open with free Adobe Reader.
After purchase:
1. You’ll receive an email with your download link immediately
2. Files are also available in your account dashboard
3. Download as many times as you need
4. Access never expires
5. Print at home or at a print shop
You can view plans on any device – computer, tablet, or smartphone. Print multiple copies for your job sit
Immediately! Your plans download instantly after purchase.
However, before you start building:
– Check if you need a building permit (most areas require one)
– Review plans carefully and adapt to your site
– Gather all materials (complete list included)
– Ensure you have necessary tools and skills
– Consider hiring help for excavation or concrete work
Build time varies by project size and experience level, typically 1-3 weeks for most structures.
Yes! We offer custom pergola, deck, arbor, and outdoor structure design services.
Custom options include:
– Different dimensions and layouts
– Integration with existing structures
– Custom architectural details
– Engineer-stamped plans for your area
– 3D renderings
– Modifications to existing plans
Contact us for a custom design quote:
Email: [email protected]
Phone: 416-951-9998
We also offer volume discounts for contractors and builders.
We provide FREE email support while you’re building:
– Questions about dimensions or details
– Clarifying construction techniques
– Material substitution recommendations
– General guidance on plan interpretation
Email: [email protected]
Phone: 416-951-9998
Response time: Usually within 24 hours on business days.
We’ve been designing outdoor structures for 30+ years and genuinely want your project to succeed. We can’t provide on-site construction help or specific local code guidance, but we’re here to help you understand and use the plans.